Showing posts with label Craft work. Show all posts

Tuesday, March 28, 2017

Adding Freshness on black-Wall Decor

Good Morning,
  To all creative minds!

This time I have come up with an elegant wall decor, Adding some magic with craft paper. Doesn't look like paper, right? Oh yes it is.
Completed this project in two hours (extra time for drying the paint and glue work). As you must have noticed, most of my projects have some recycled items in it.


So let's get down to business. Please follow the details below:

Items for the project:
1. Colour craft paper
2. Washi tape
3. Black chart for background
4. All purpose glue
5. Sketch pen for adding details.
6. Round wooden plank from cake base
7. Ribbon
8. Wire

Procedure:

1. Clean and dry the wooden Plank. cover the back with paper or can paint for perfect finish. Remember to add the ribbon to hang the piece on wall. (sorry couldn't get the picture).
2. Cut black chart as per the size of the plank and stick on with glue.
3.  Decorate the border with silver washi tape.
4. Prepare colourful paper flowers (that's a different tutorial). Twist the wire into spiral as shown the photo above and cover it with green washi tape adding leaves with the same.
5. Stick on the prepared leaves and flower on the board and we are done.
So simple.

Have a great day!

Thursday, March 23, 2017

Another addition to 3D Wall-Art


Warm Regards,

    Here, I am with another episode of Wall Art. I have developed kid of ardour for 3D wall decor. It gives fresh and lively look to any boring room. We just need various textured craft paper, pair of scissors, craft glue, yarn and pencil to draw the cut-out. Below, I have also attached my earlier project, just to refresh.


If you like the idea please leave your comment to appreciate.

Bye bye. 

Tuesday, June 28, 2016

DIY; Super cool Custom pillow case

It feels wonderful when we receive or give custom made gifts to our loved ones. I have tried my hands on sewing a cute pillow case for my sweet little sister. My sewing machine said,'Thank you for removing the dust on me and moving my parts.'
Having an infant at home there is hardly any time for myself yet my creative side keeps peeping out and looking for an opportunity to showcase the ingenious mind. It's been almost a month since I was trying to update my blog on new DIY projects and finally tonight I got the opportunity.
Ok, now lets get into business and I will share the super cool custom made pillow case details.
Next time before discarding your old clothes think twice and there will be a plethora of ideas to upcycle them.


What you need:

1. An old kurta. (Cotton preferably)
2. Old T- shirts.
3. Lace
4. Pair of scissors.
5. Matching thread
6. Sewing Machine for sure.
7. Cotton

Procedure:

Step 1- Measure and cut the kurta as per your pillow. Keep 4 inches extra in one side for the backward fold.
Step 2- Prepare the applique. Whatever you want to say or whomever you want to address. This one was for my sister so I made it "SIS".
Step 3- Now the fun part. I wanted to say "Love sweet Sister" so made a heart, chocolate and sister applique. Make sure to fill in the image with cotton for the pop. Wow.
You can think of anything and cut images accordingly.
Step 4- Mark the images in place and then sew them.
Step 5- Final procedure is to sew both front and back sheet of the pillow cover and attach the lace in the border.

Done... now my baby is being impatient so I got to stop. Feel free to drop in any query or feedback.

Wednesday, January 6, 2016

Add colour at home with recycled flower vase

Dear Viewers,
  
      I have made a colourful vase with cute flowers out of waste materials. You can also recycle stuff at home into decorative piece. I have mentioned below the do-it-yourself (DIY) tutorial for craft lovers. 


Items required for the Vase:

1. Any kind of Glass bottle. (Mine is a ketchup bottle)
2. Wool with few contrasting colours. You can use blue, green, yellow, orange, red...)
3. Any Craft glue, (I have used fevicol craft adhesive)
4. Tissue paper to clean ad dry the bottle.
5. Scissor

The flowers are made from crepe paper. Feel free to contact for the flower making tutorial.

Steps :
1. Clean and dry the bottle and make it ready for the transformation.
2. Start applying glue from the base to 1/4 of the bottle.
3. Roll the woollen ball around the bottle and cut at 1/4 length.
4. Next keep applying glue to the ext section and add another contrasting colour wool one after another till the top.
5. Keep it in a moisture free area and let the vase dry completely.

Simple yet beautiful!

Tips: Apply adhesive in sections so that it doesn't dry up or mess your hands and the bottle.

Most important criteria for any craft work is to have patience and enthusiasm.

For those of you who will try this DIY, I would love to hear your feedback.


Cute Floating wall art


My way of renovating boring room into cute interesting 3-D wallart :p I am sure kids would love to decorate their room and with little help from grown ups there is no limit to your imagination. 


1. The first one is quite simple.  You will need colourful craft paper, woollen thread, 


Tuesday, September 22, 2015

Gold craftsmanship

It's not 24 cr Gold craft but definitely complete gold creativity


Mr & Mrs Frame


DIY miniature gem show piece

Fun and simple miniature gem show piece. 
Guess what are the raw materials??? 


Monday, September 21, 2015

Newspaper Penstand

I am suffering from creative craft attack. Bacchao...
 Recycled newspaper into innovative pen stand.


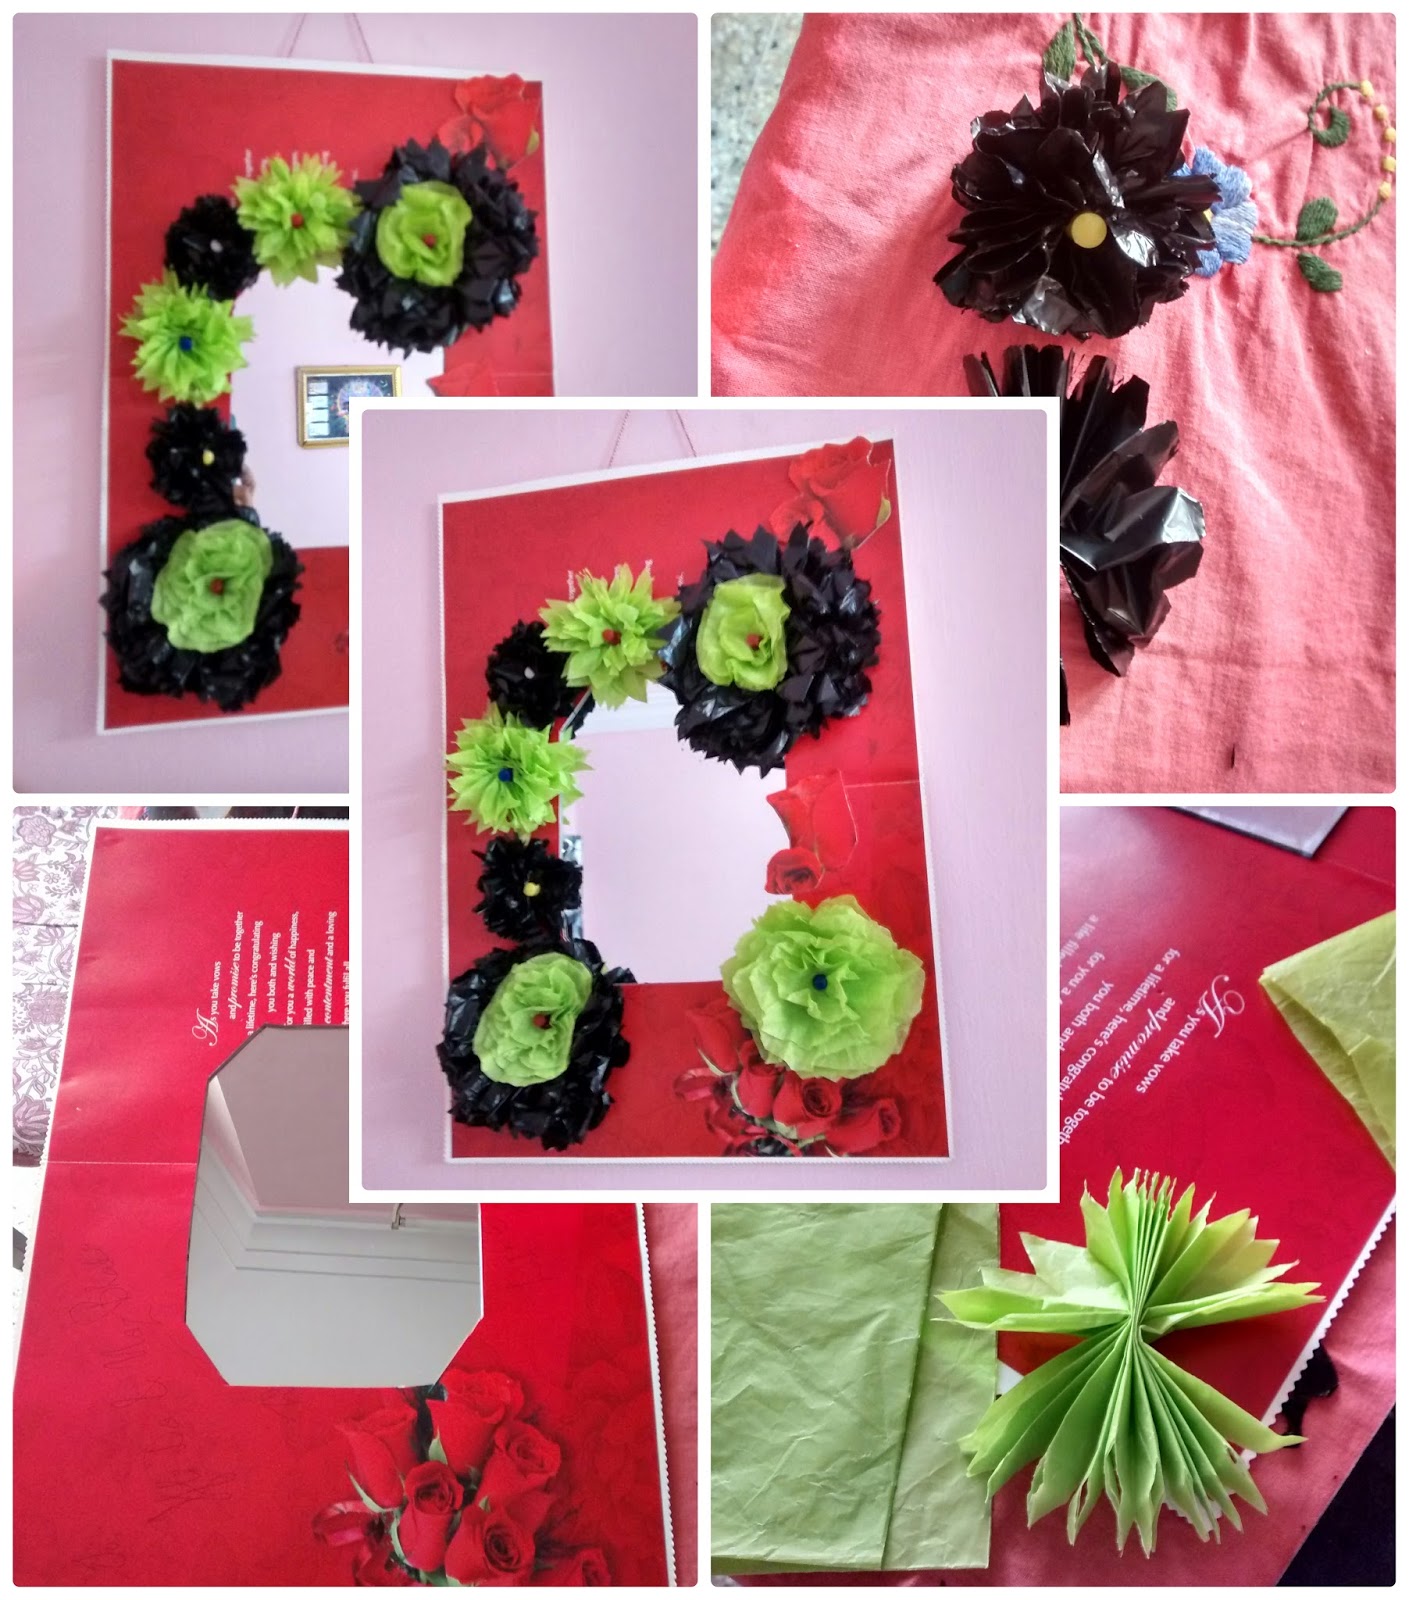
Floral Love Decor


Revamp old Mirrow into cute spring wall decor.


Tuesday, August 25, 2015

Floral DIY


It's spring season throughout the year. Floral craft to add colour at home and I am so excited about my latest craze ;)


Wednesday, August 12, 2015

DIY Mirror Decor


Recycling old and unused stuff can be so much fun. Home decor mirror so easy, cute and inexpensive.

Monday, June 24, 2013

SEE-THROUGH WALL MOUNTED STORAGE

Organizing small items at home is always a tedious task. Today, I am going to share with you how easily you can make a wall mounted organizer which not only saves space & time but can be made from disposable articles.


Items required:
1. Medium/large size transparent packet with hook (usual apparels are packed);

alternatively you can get a durable plastic sachet, drill a hole & insert a hanger to hang up.
2. Stapler, sellotape, thread & needle.
3. Scissor, Cutter & chopping board or any hard board.
4. Pen & a long scale.  
5. Ribbon or lace & decorating stuff of your choice.
Time required: Almost half an hour.


Method:
Step 1- Insert the chopping board/hard tray, etc, inside the packet. Measure & draw two straight lines across it in equal distance. Then slit it carefully as shown in the image, make sure you don’t cut till the edges just leave half inches on both sides. See image 3.


Step 2- Secure the ends after cutting with sellotape. Note: upper end stick to base as to make a pouch & lower end to seal the edges so that it doesn’t tear off later. Secure the slit joint by stapling it. See image.


 Step 3- Sew the ribbon/lace on top of the sellotape of the pouch you have made, in big loops, for stronger base to hold items.
 Step 4- Twist the ribbon & lock it by stapling, giving extra hold in the corners.
Step 5- Give the finishing touch by decorating with individual creativity. I have used an old hair-band for the pouch openings.


Dhan-te-nan your “see-through wall mounted storage” is ready, now you can sort out items & place accordingly.  The transparent look will help in identifying your articles easily. You can keep jewellery, make-up items, assorted school & office supplies, key chain, coins, important papers & the list goes on.  My husband says it looks very girly but never mind. You can change the look with your creativeness.  

Thursday, June 20, 2013

Simple & colourful candle stand from household items

Since, I don’t like sitting idle, my mind keeps looking for ideas to utilise my time in the best way.  Today, I have come up with a simple craft converting household items & waste into useful output. This may sound child-like but never mind, I wish to share with like-minded people.  Below I have listed the details of making a candle stand with household items.


Time required: half-an hour
Ingredients: Waste glass bottle, pulses of different colours for filling, ribbon for decoration.


Method:-
Step 1: Wash the waste glass bottle thoroughly to remove label & dirt. Dry it properly both inside & outside.  If the bottle remains dam the pulses may get rotten inside :/ eww & you don’t want that.
Step 2: I have used 6 varieties of pulses namely,  masoor & moong daal mixture(first layer for  beautiful coloured base, then green gram, followed by Chana Daal, Kali daal & on top of the bottle filled few large beans to close the neck. Make sure you leave the neck part half-an-inch empty to insert the candle. You may use as many coloured pulses as you like.
Step 3: After filling the bottle tightly, decorate only the neck part, with colourful ribbons. Make sure you don’t overdo as it may spoil the look.
Step 4: Insert the candle to see if it fits in properly else you can melt the base a little to tighten the grip. Make sure it doesn’t fall off as it may lead to accidents.

 That’s it your simple & colour full candle stand is ready. Have fun & stay safe.